Showing posts with label Simple Project. Show all posts

Saturday, April 13, 2013

Simple Saturday: Knit a Bandana Scarf for Yourself or Your Dog

Want a really simple knitting project that lets you start working on making increases?  Then this bandanna pattern is for you.  With just a bit of yarn, I used a 120 yards of worsted weight, but you can use any weight you want as long as you match the weight to the needles, you can make a simple Bandana scarf for yourself your your dog.  The pattern is from Last Minute Knitted Gifts by Joelle Hoverson, but the idea is so simple you don't really need a pattern, you are just knitting a triangle.

Bandana Scarf for Dogs or Humans
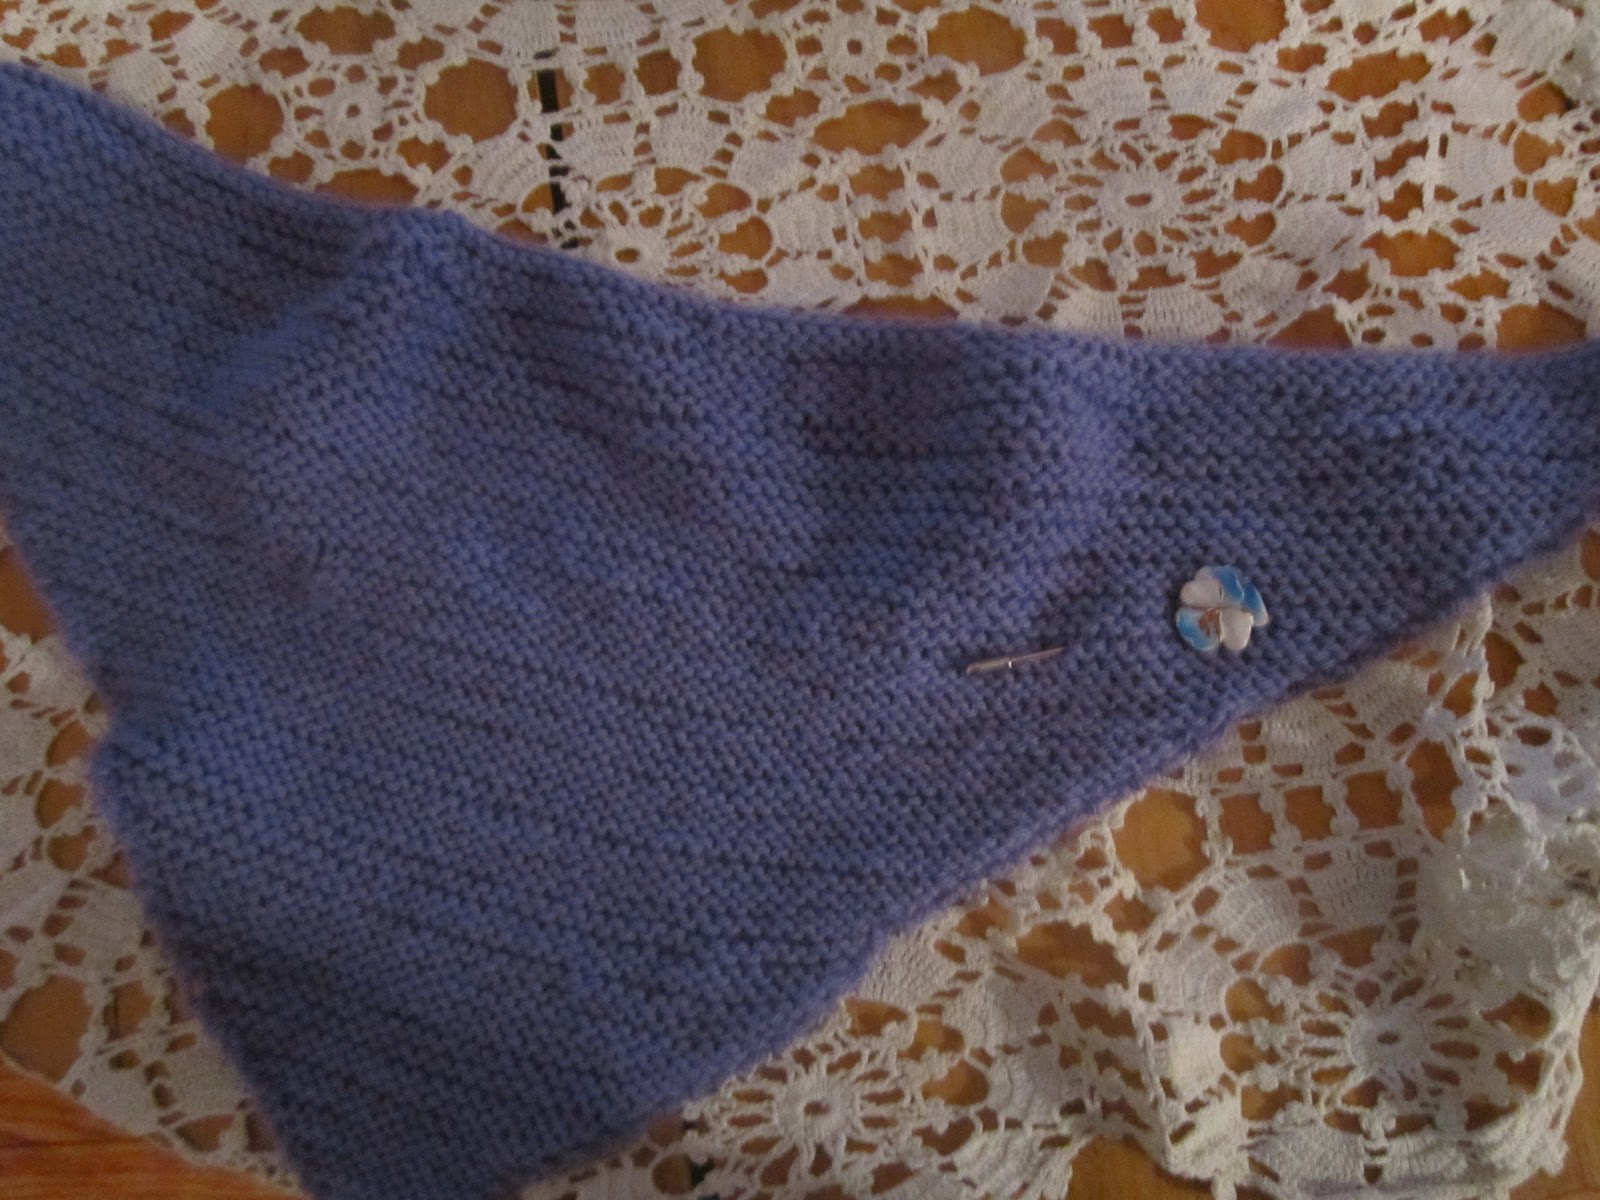

Cast on 3 stitches with whatever weight yarn and needle size you are using (make sure  you have enough yarn about 100-150 yards or a little more and then  you can just stop when the scarf is big enough).  I used a long circular needle because I think its easier to acomodate the stitches as the triangle grows, but you can use regular straight needles if you want. Slip the first stitch knit the next stich and then knit front and back in the last stitch to increase one stitch.  


Continue slipping the first stitch, knitting across the middle stitches, and kfb on the last stitch in each row until your bandana is large enough and then bind of losely.

110 yards of worsted weight yarn makes a nice bandana for a larger neck dog:

Or for a human.


I definitely think the finished project looks way better on Bob and Norbert then on me, but they are natural models.

PS: Don't forget to enter Bob's Birthday Give Away to win a Day Dog Designs collar we are announcing the winner on April 15. 


Wednesday, January 30, 2013

Words from Weasley and Some Knitting Patterns

Weasley here:   Mom wants everyone to know that in our Wordless Wednesday post where I was pictured starkers in the snow

 my nakedness was of my own doing.  I had been warmly ensconced in my Pug Snuggly coat  but then I ran about with such vigor that my coat feel off and I would not stay still for mom to put it on me again.  Anyway, the walk was cut short because Norbert got salt in his paw and we had to go home.


Now mom wants to share some simple knitting patterns from the net so please discontinue reading if you are board by talk of knitting.   The first is The Just in Time Neck Cozy


Purl  Bee recommends a staggeringly expensive yarn, really that money could be used to buy treats and toys!, but mom used Lion Brand Jiffy Thick and Quick which is acceptably low cost.  This project only took mom an hour and a half and she is a slow knitter.  She made a few for friends too.

The second scarf is the The Fisherman's Rib Cowl

Fisherman's rib is a nice easy stitch pattern that is a little different but not hard.

This cowl too mom a bit more time, about two weeks on and off and used one skein of Rowanspun Aran yarn.   She made a few mistakes too but decided to wear it anyway. 

The last project is the Vine Lace Baby Hat which mom made for our dad's new baby niece.

Mom thinks she made some mistakes in this too, but thinks it looks acceptable.   It used less then one skein of Lion Brand Organic Cotton.

We are pretty bored by the knitting and definitely think its time for mom to make something for us, dog sweaters perhaps?  Or maybe some knitted toys.

(Note: We have scheduled Weasley's neuter for next Thursday, February 8th and I am already feeling a little nervous about the anesthesia since I am super paranoid in general so send us some positive vibes)

Sunday, January 6, 2013

Simple Projects-Easy Denim Tug Toy

This is definitely not a new idea and plenty of bloggers have probably already made this toy, but its very easy and dogs really do love it.

All you need is a scissors and a pair of old jeans


Cut five strips from the jeans legs, 3 long and two short.  IF your jeans are for a short person lie me then make sure you cut the whole leg for the long strips or they wont be long enough.  

Put the three long strips together and use a short strip to tie it off very tightly:


Braid the long strips tightly and tie off with the second short strip.    Five minute tug toy:


Now have fun.  


Friday, November 11, 2011

Simple Projects Fingerless Knits-Knit with the Magic Loop Method

I have been wanting to expand my knitting repertoire beyond scarves.  So I decided to try fingerless mitts--


I used this free pattern from Ravelry.  I choose it because it uses the Magic Loop method and I thought that would be easier then double pointed needles.  They were very easy to make and they have a pretty cable pattern on the cuff, my lousy too dark pictures definitely don't do them justice.  Since I knitted them up in October, for a friends birthday, I used a nice, inexpensive pumpkin colored yarn from lion brand.  I did make two changes from the original pattern, since I am a very loose knitter I used size four needles instead of the size sixes recommended in the pattern. (if you are a new knitter like me I would recommend making a gauge.  I also extended the cuff by adding five extra rounds of ribbing before the first cross stitch round.  As for the cross stitch in the pattern its really easy once you get the hang of it, it helps if you are a bit of a loose knitter like I am. 


Wednesday, October 19, 2011

Simple Projects: Basket Weave Scarf

If you are a beginning knitter and you want to make a scarf that is a bit more interesting then a basic stockinette, then a basket weave scarf is for you (please ignore the dog hair in the bottom picture, it clings to everything I own).   All you need to know to make it is how to cast on, knit, purl, and bind off.

Materials: 
  • 300 yards of DK Yarn (I used Manos Del Uruguay from Purl Soho)
  • Size 6 needles
  • yarn needle
 Cast on 32 inches.  Knit 4 and purl 4 for rows 1-4.  Then reverse and purl 4 knit 4.   Continue until you run out of yarn.   Bind off and weave in ends.  This can  be adapted to any weight yarn and needles you would like to use.

Monday, October 17, 2011

Easy Giant Knitted Squeeky Pillow Dog Toy

I made this toy quite awhile ago as a way to practice some basic knitting skills: knitting in the round, increases, decreases, and color changes. 


What I did was knit a big tube and then stuffed it with poly fiberfill and some squeakers (put in a couple squeakers in different places to make it fun.

You don't need a pattern for this as its just a tube shape with a decrease in the middle.   Use circular needles, I used size 5 16 inch needles, but smaller needles would be better (or double points).  Cast on an even number of stitches, I did 40, with some inexpensive or scrap yarn (I used about 200 yards of cheapo Read brand yarn in red and purple) and join for knitting in the round.  Knit for about 5 to 7 inches, changing colors if you want to make stripes like I did, and then knit 2 decrease rounds by knitting 2 together for the entire round.  


Knit for 3 to 5 more inches and then knit two increase rounds by doing knit 1 (k1) and then make 1 (m1) through out the rounds.


Then knit for aother 5 to 7 inches, changing colors for striping if you  like and bind off leavinga long tail.  Stuff the pillow with polly fiberfill and squeakers and sew it shut with the long tail. Give it to your dog, even if its lumpy and a bit ugly like mine they will still enjoy it!  Bob likes to use his as a chin rest.

Thursday, September 22, 2011

Simple Project-Harry Potter Scarf Knitted in The Round

As I mentioned before in my simple projects posts I have been learning to knit.  I am still very much a beginner and definitely make a lot of mistakes.   I wanted to share the first thing I knitted, a Harry Potter scarf (fitting since I am a major fan-link).  One of the major reasons I wanted to learn how to knit is that the Harry Potter books are full of references to knitting and there are lots of fun knitting projects inspired by the books and movies.  A lot of them can be found in this book: 


http://ecx.images-amazon.com/images/I/61qE9UraSoL._BO2,204,203,200_PIsitb-sticker-arrow-click,TopRight,35,-76_AA300_SH20_OU01_.jpg

Charmed Knits available from Amazon.   Most of the projects are way beyond a beginner like me, but it is a great read anyway and it gives me something to aspire too.  The simplest project in the book, the first and second year scarf, is available online already so I don't feel bad about posting it here.  It is modeled after the scarf warn in first and second movies.   

The scarf is knit in the round, so you only need to know how to do the knit stitch to make it.  
Bob is totally ready to enroll
https://blogger.googleusercontent.com/img/b/R29vZ2xl/AVvXsEiz71-9MbXtFnG-vrN72zVZil4v0NY4jnDEENsS2HmuWcJ7HXQJgV347m2msin8sSguuw35mfsPLeexgcpxD4g16Zyz9ONFv28TAf11SQbc09QyJWAAZUBV3548zFGm7cIchH4OjDfCvac6/s1600/hp2-hogwartsscarves.jpg

Harry Potter House Scarf-Knitted in The Round

  • Size 8 16 inch circular needle
  • Yarn in house colors , for Gryffindor you need 460 yards of Burgandy yarn and 420 yards of gold yarn.  I used lion brand yarn but the book recommends  Cascade Yarns, Superwash
  • Yarn needle
  • Crochet Hook Size J 
 Cast on 70 stitches with color A (Burgandy for Gryffindor, Dark Green for Slytherin, Royal Blue for Ravenclaw and Yellow for HufflePuff). Place a marker and join in the round
Knit 23 rounds of color A, 19 rounds of color B, (I used the cut and tie method but you could also use the wrap a new color method to do color changes), 24 rounds of color A, repeat. 

You should have about 19 color changes. 

Note: This scarf is really long, I decided to end mine after 17 color changes.

Bind off 


Fringe: 
Cut 84 pieces of yarn in color A and 70 pieces of color B, each strand 15 inches long.   
Hold 7 strands of yarn together and fold in half.  Place the yarn on the the Crochet hook  and pull through both layers of knitting.  With the loop still on the hook catch the yarn ends with hook and pull through the loop to knot.  Pull tight to secure.  For fringe groups begin and end with color A.


As demonstrated by Norbert the scarf is the perfect thing to wear while lying around the house reading.


Friday, September 2, 2011

Simple Projects-Easy Infinity Scarf..and Shutterfly Book Promotion from Pet Bloggers United

Over the last few months, I (urban hounds mom) have been attempting to learn how to knit, and with mixed results.   I first started learning in February and I took a few classes at the now defunct Stockinette cafe in Jersey City.  The classes helped some, but much more helpful where the youtube videos I watched.   I also found the book The Chicks With Sticks Guide to Knitting very helpful, it was definitely the best of the learn to knit books I looked at and is truly tailored for the beginner (i.e. someone like myself who had never before held knitting needles).  It has a lot of really pretty projects in it too, things people would actually like to wear. 

 Reasoning that I cant be the only person who wants to learn to knit, and that if a pattern is simple enough for me to follow then anyone can follow it, I have decided to post some of the projects I have made on here.  My ultimate goal is to be able to make dog sweaters, and a sweater for myself as well, but that may be a year or so off.   I have definite sweater fear.

One of the first things I knitted somewhat successfully was a simple infinity scarf, or cowl.  Here is the picture:


It is very quick to make, and basically impossible to screw up, as its basically just a tube of knitting.   I definitely made a few mistakes along the way, but you can't really notice when its on.  Definitely a great beginner project:

Materials:
Pattern:

I didn't use a specific pattern for this.   Instead I looked at a bunch of patterns online and came up with this:

  • Make a slip knot (slip knot tutorial) Note: I usually always make a longer tail then 12 inches, more like 20)
  • Cast on 80 stitches, if this doesn't seem like enough stitches add 10 or twenty more (cast on tutorial) Note: I was scared of circular needles at first but you cast on the same as you would with straight needles, just hold one side circular needle as if it was a straight needle and let the needle on the other end dangle out of the way)
  • Position the stitches evenly around the circular needles, making sure that its not twisted, you should be able to trace your finger around the circular needles on your stitches like a train car on a railroad track.
  • Join in the round (tutorial)
  • Place a stitch marker like she does in the video
  • The pattern I used was knit one (K1), Purl 1 (P1) all the way around.  You could also do all knit stitches.  
  • Knit Stitch Tutorial
  • Purl Stitch Tutorial
  • Once your work measures about 12 inches you are ready to bind off. Bind Off Tutorial. 
You've got an infinity scarf/ cowl!  Wear it with pride.


On another note we were looking at the PBU Pet Bloggers United Site


Photobucket


and we saw that Oscar had posted about this awesome promotion  from Shutterfly.  If you have a blog you have a chance to win a free photo book, we made one of Bob when he was a puppy.  We also use shutterfly every year to make our Holiday Cards.  Here is last years: